If you are dealing with graphic design as a professional or amateur, you are used to vector drawing programs. There are two main programs used in this field today. Adobe Illustrator and Corel Draw. I focused on the use of Coreldraw for years. This was due to my engineering education. I was using AutoCAD and COrelDraw was closer to this vector design. At that time, Illustrator was trying to do vector work with Photoshop features. Anyway, this is a different matter. Let’s now explain the export process of Adobe Illustrator, which is somewhat complicated, but provides convenience in itself.
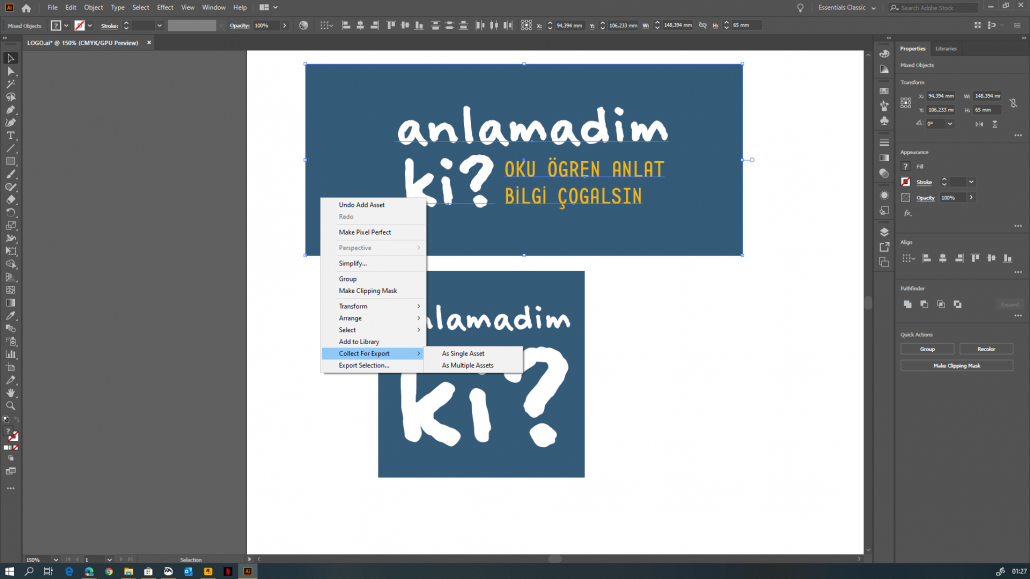
First, we select the objects we want to export in the area we work in Adobe Illustrator. Then we click on these selected objects with the right mouse button. We select the “Collect for Export” submenu from the drop-down menu. In the menu we see 2 options that open to the sides. Both serve the same purpose and allow you to export the selected item. But there is an important difference. Let me explain both in detail.
You will see “Export Selection” at the bottom in the drop-down list menu. From here, it opens the “Transfer to Screens” window and adds “Single Asset”.
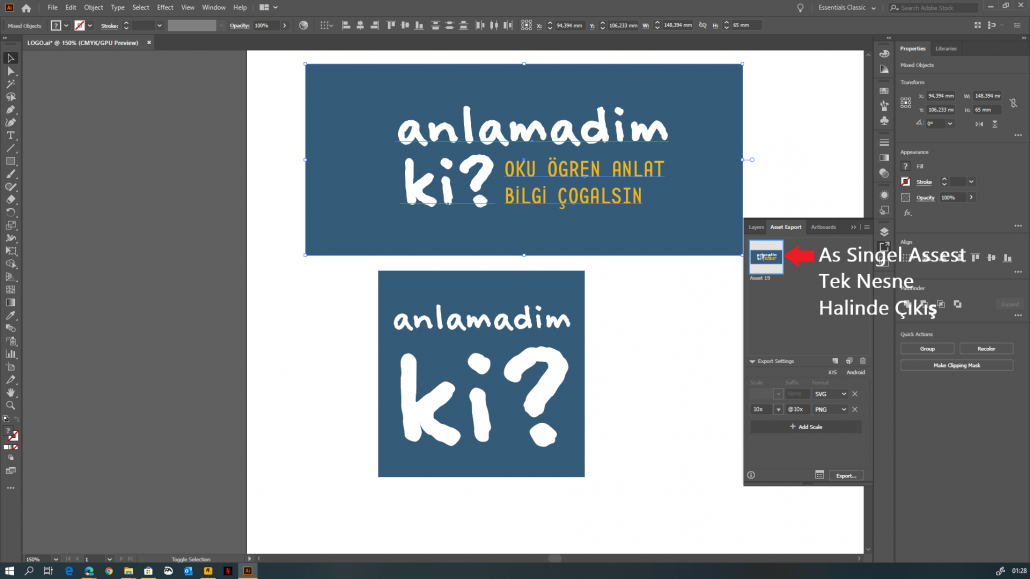
As Single Asset
If you select the first option “As Single Asset” (as a single object), all the objects you have selected are combined into a single object and ready for export. And it occurs as a single object in the Asset Export utility window. You can now export with the export button by making your desired export settings from the “export settings” section in this menu.
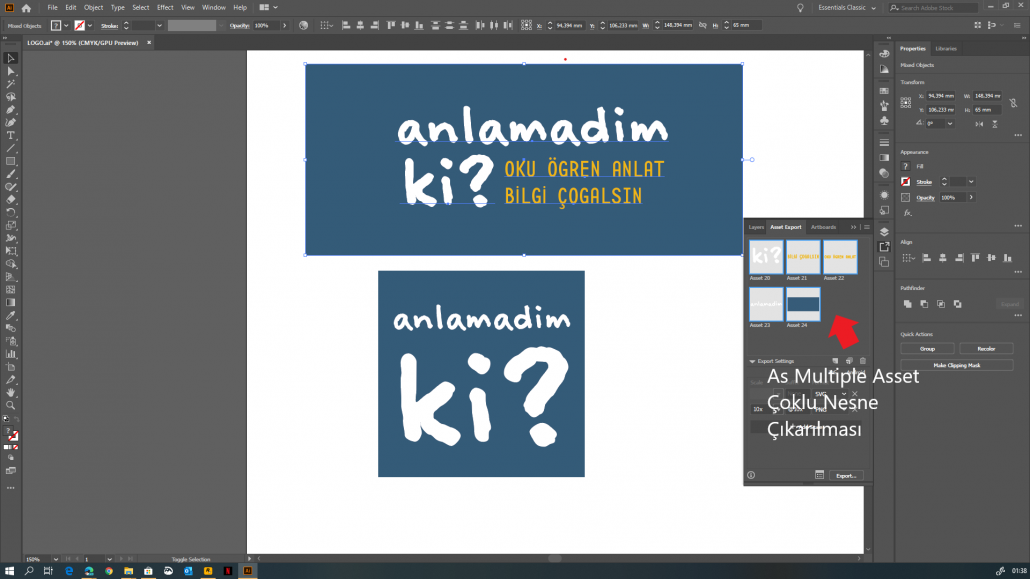
As Multiple Assets
In this option; adds all the objects you selected to the “Asset Export” window, which will be displayed separately. For example, if you selected two objects, these two objects are located independently in the helper window. Here is a convenience and useful activity for you. You can export it by selecting the desired object from this utility window.


